Build and Test
Now that we've downloaded the sample code, let us build and test the mobile app.
Before we start, make sure that your Xcode is properly configured for building and testing mobile apps. We assume that your Xcode is all set.
Building Hello Kii
Follow these steps to make the Kii Cloud SDK referenceable from the sample project and the project buildable.
Make CocoaPods available. See the CocoaPods guides for configuring CocoaPods.
Unzip the sample code in a directory of your choice.
Open Terminal and move to the directory of the sample code. The directory contains a predefined
Podfilefile for Hello Kii.In order to download the Kii Cloud SDK and make it referenceable from your project, execute the following command.
$ pod installThis command creates a workspace file (an XCWORKSPACE file). This file contains information that defines the relation between the project and the SDK.
Open Xcode. Choose "File" > "Open", and select the directory of the sample code or select the workspace file itself and click "OK".
The SDK is not correctly referenced by the project if you open the project file.
Click "Run" to build Hello Kii.
If the build fails, check the error codes and messages recorded in logs to find the root cause.
Testing Hello Kii
Run the mobile app in Xcode to launch it.
Kii recommends testing in Simulator because you need to satisfy prerequisites such as certificates to test your mobile app on a real device.
Now you can manipulate the mobile app as you want. In this tutorial, let's manipulate it with the following steps:
You will find that the mobile app works as expected in these steps. Here, check that you can implement common features easily with Kii Cloud.
You will see the following login screen after you launch the application.
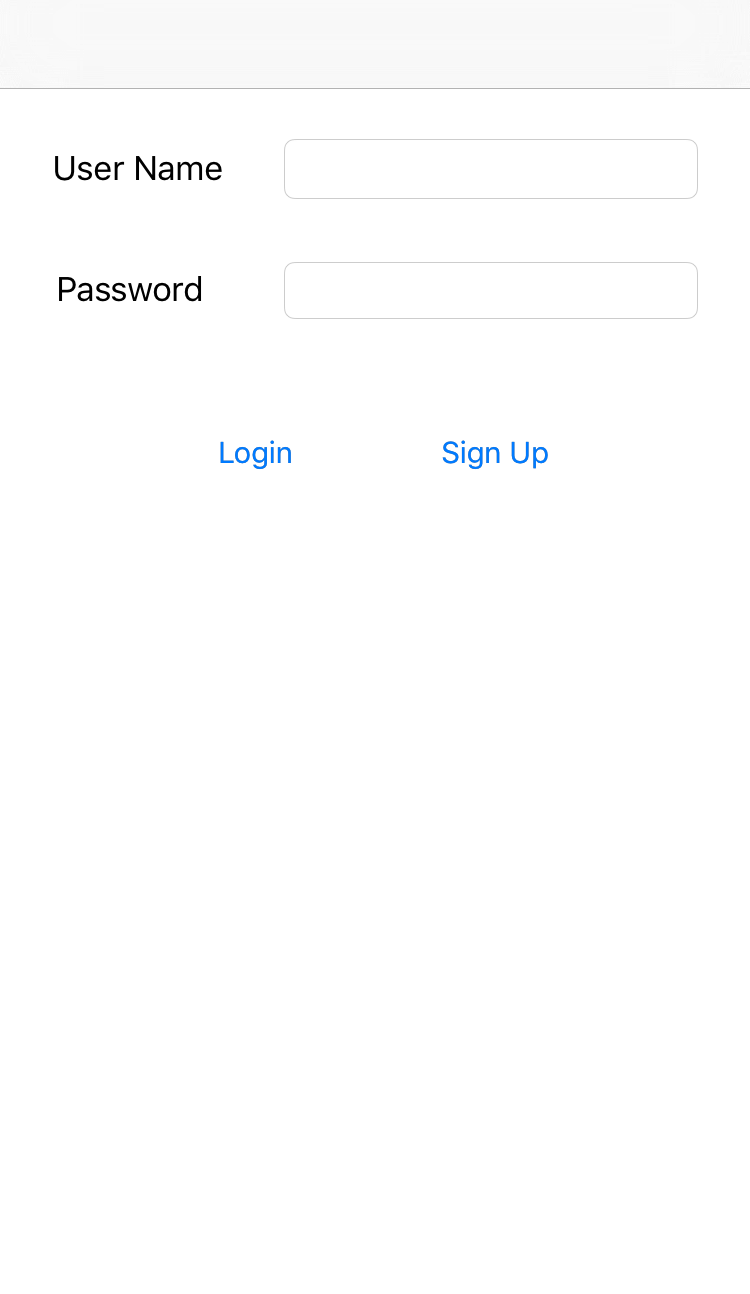
Type in the following user information and tap the "Sign Up" button.
- Username: aaaa
- Password: 1111
When you tap the "Sign Up" button, the application will communicate with Kii Cloud and create the specified user.
The following data listing screen now shows up.
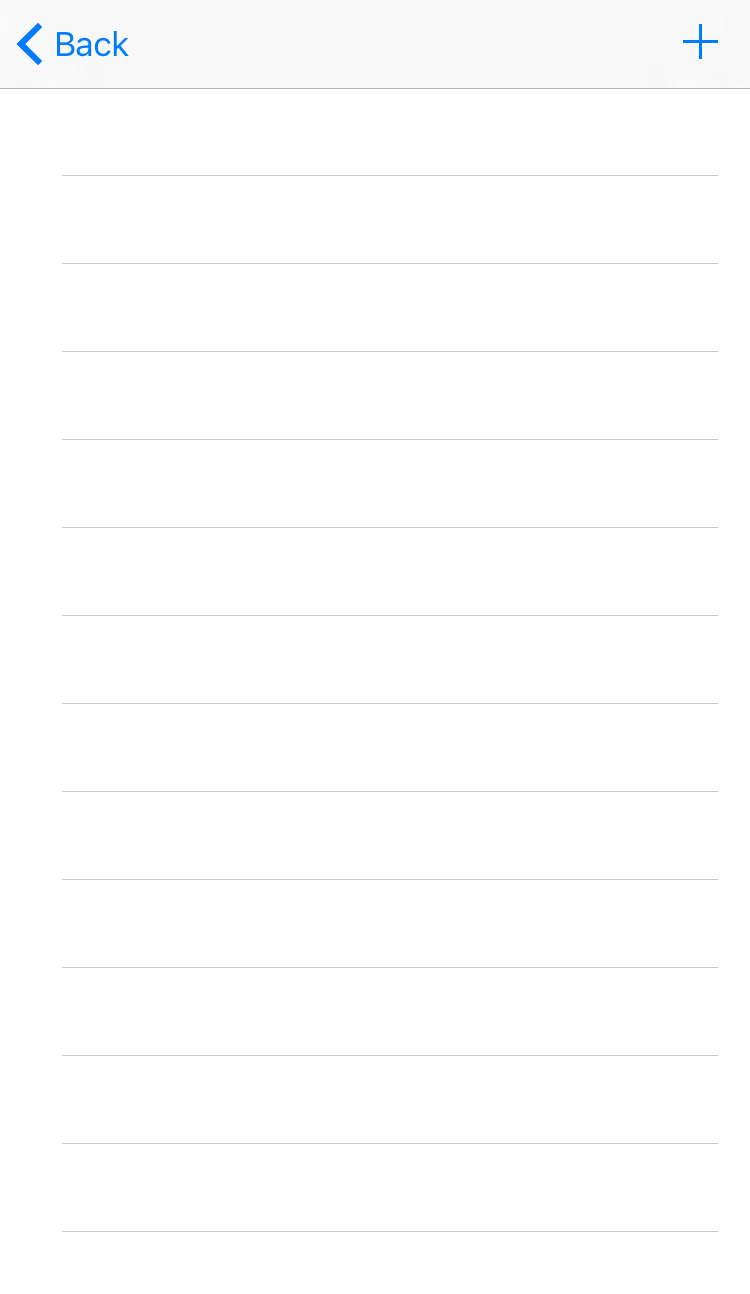
There is no data at this point, so the list is empty.
Tap the "+" button three times.
Tapping the "+" button will create a new object and show it on the screen. At the same time, the same data is uploaded to Kii Cloud.
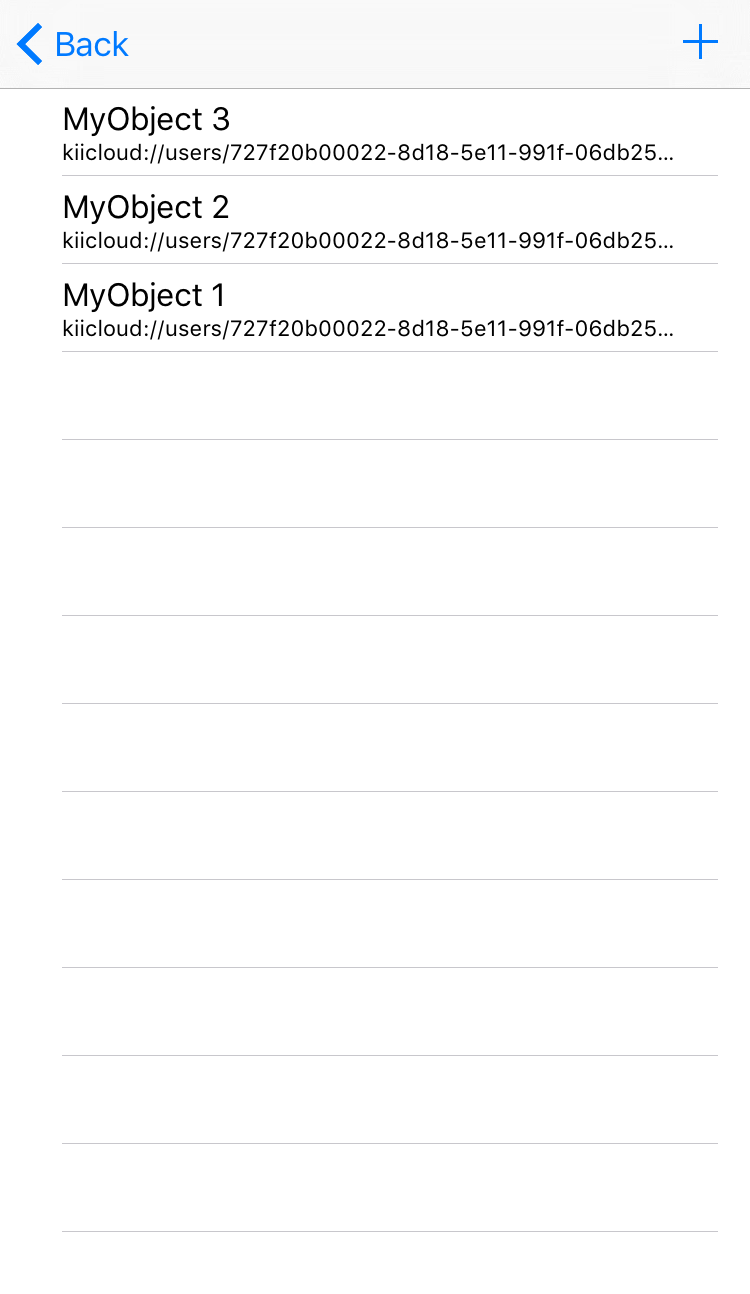
Each object has a title such as
MyObject 1. The number is incremented every time an object is added.Under the title, the URI of the KiiObject that corresponds to the object is displayed as an identifier of the object.
Tap any item in the list on the screen to delete it.
Next, exit the mobile app for the moment.
Go back to Xcode and select "Run" in the "Product" menu again.
The login screen opens again.
Log in to the application with the credentials for the created user (username:
aaaaand password:1111) and tap the "Login" button.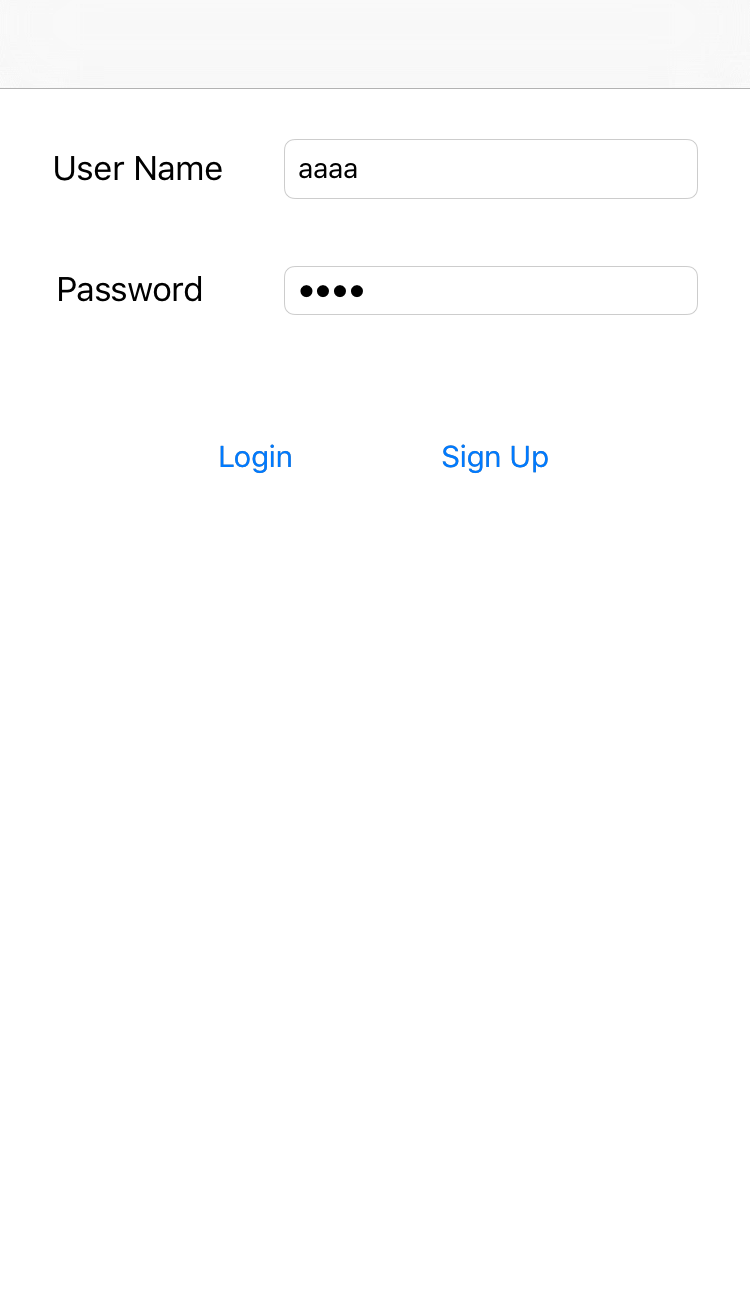
You should be able to see the same list of data that you've seen in Step 4.
This data is retrieved from Kii Cloud.
If you tap the "+" button at this point, a newly created MyObject will have the suffix number 1. The suffix number is reset because Hello Kii does not preserve the number when the mobile app is closed; the feature to preserve the number is not implemented for the code simplicity.
Restart the mobile app again to open the login screen.
Now, let's register a new user. Type in the following login information and tap the "Sign Up" button.
- Username: bbbb
- Password: 2222

This time, you will see an empty list of data.

This is because we are now referring the region different from that of user
aaaa. If you log in again as the useraaaa, you will see the list of registered data again.
What's next?
We will show you how you can browse the application data on the developer portal. This feature is useful when you want to verify the data while you are developing and debugging your application.