Implement Receive Processing
Next, let us implement the receive processing of push notifications with the MQTT library.
MQTT does not require special configurations unlike the other push notification networks. The user program completes all the processing.
Getting an MQTT endpoint
First, implement the code with which you connect to Kii Cloud and get an MQTT endpoint.
Replace the contents of the main.js with the sample code below:
function execute() {
var username = "user1";
var password = "123ABC";
KiiUser.authenticate(username, password).then(
function(theUser) {
var development = false;
return KiiUser.getCurrentUser().pushInstallation().installMqtt(development);
}
).then(
function(response) {
var installationID = response.installationID;
return KiiUser.getCurrentUser().pushInstallation().getMqttEndpoint(installationID);
}
).then(
function(response) {
var username = response.username;
var password = response.password;
var mqttTopic = response.mqttTopic;
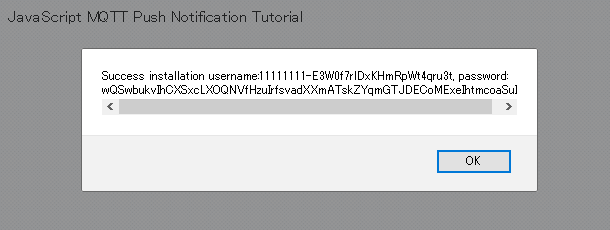
alert("Success installation username:" + username + ", password: " + password + ", mqttTopic:" + mqttTopic);
}
).catch(
function(error) {
var errorString = error.message;
alert("Error in Initialization: " + errorString);
}
);
}
Here is what is happening in the sample code:
User Login
Log in to Kii Cloud with the user which was created previously. User login is necessary because push notifications from Kii Cloud are sent to users.
Log in with user
user1and password123ABC. The function in the firstthenblock is called if the login succeeded and that in thecatchblock is called if the login failed.Install User for MQTT
This process is performed after successful login.
In order to use the push notification feature, you need to install (register) the information of the user, who will receive push notifications, to Kii Cloud.
Execute the
pushInstallation()of the logged-in user to get theKiiPushInstallation, and call theinstallMqtt()of theKiiPushInstallationto install the user for MQTT.Get an Endpoint
Execute the
getMqttEndpoint()to get an MQTT endpoint for the user which was successfully installed.
The last then block is processed after an endpoint is successfully obtained. Eventually, an MQTT client connects to the endpoint, but the above sample code uses the alert to display the username and password for MQTT connection and the MQTT topic.
The information for MQTT connection will be displayed when you run the main.js.
Implementing an MQTT client
Replace the then block which contains alert("Success installation ...") with the sample code below in order to enable the web app to connect to Kii Cloud with an MQTT client.
Implementation varies depending on the library of your choice. Check the tab page for the library used in your implementation.
-
...... ).then( function(response) { var username = response.username; var password = response.password; var mqttTopic = response.mqttTopic; var endpoint = "wss://" + response.host + ":" + response.portWSS + "/mqtt"; var client = mqtt.connect(endpoint, { username: username, password: password, clientId: mqttTopic, }); client.on("connect", function() { console.log("MQTT Connected"); client.subscribe(mqttTopic, function() { console.log("MQTT Subscribed"); }); }); client.on("message", function(topic, message, packet) { if (topic === mqttTopic) { var payload = JSON.parse(message.toString()); var myMessage = payload.mymessage; alert("Message Arrived:" + myMessage); } }); client.on("error", function(error) { alert("Error in MQTT" + error); }); } ).catch( ...... -
  ......
  ).then(
    function(response) {
      var username = response.username;
      var password = response.password;
      var mqttTopic = response.mqttTopic;

      var endpoint = "wss://" + response.host + ":" + response.portWSS + "/mqtt";
      var clientId = mqttTopic;
      var client = new Paho.MQTT.Client(endpoint, clientId);

      client.onConnectionLost = onConnectionLost;
      client.onMessageArrived = onMessageArrived;

      client.connect({onSuccess:onConnect,
        userName:username,
        password:password,
      });

      function onConnect() {
        console.log("MQTT Connected");
        client.subscribe(mqttTopic);
      }

      function onConnectionLost(responseObject) {
        if (responseObject.errorCode !== 0) {
            alert("MQTT Connection Lost:" + responseObject.errorMessage);
        }
      }

      function onMessageArrived(message) {
        if (message.destinationName === mqttTopic) {
          var payload = JSON.parse(message.payloadString);
          var myMessage = payload.mymessage;
          alert("Message Arrived:" + myMessage);
        }
      }
    }
  ).catch(
  ......
Both cases connect to Kii Cloud working as the MQTT broker and set callback functions.
Connect processing
The function argument response receives the MQTT broker information obtained by the getMqttEndpoint() using Promise. Get the necessary information for connection from the response and initialize the MQTT client. See Establish an MQTT Connection for details of obtainable parameters.
First, set the destination URL in the endpoint variable. The format of the destination URL is wss://hostname:port_number:/mqtt. You can get the hostname from the response.host and the port number from the response.portWSS.
The response receives four port numbers which support the four types of connection methods of using TCP or WebSockets with/without SSL/TLS. Usually, use WebSocket with SSL/TLS. A number of MQTT libraries assume use of WebSocket on the browser instead of direct TCP connections. Also, it is appropriate to use SSL/TLS connections for higher security.
The other necessary information to connect to Kii Cloud as MQTT broker is as follows:
Specify the MQTT topic name as the MQTT client ID.
Specify the values obtained from the
responseas the username and password.
Set callback functions
Next, set callback functions. The following three events are processed with callback whether you use MQTT.js or Paho.
Process after Connection is Established
The callback function which is called after the connection is established subscribes the MQTT topic which was obtained from the
response.mqttTopic.The purpose of the MQTT topic is to create a communication path for MQTT push notification. Kii Cloud assigns one MQTT topic to an MQTT connection. The user can receive push notifications as PUSH commands from the server by subscribing the MQTT topic.
Note that the MQTT topic and the topic for the Push To User notifications feature provided by Kii Cloud are different. The topic for the Push To User notifications needs to be subscribed separately if you use this feature. See Push Notification for more information. This topic describes the subscription process in the Kii Cloud SDK for Thing.
Process after Disconnection Occurs
The callback function which is called after a disconnection occurs displays an error message.
The two libraries used in this tutorial issue an error when a disconnection occurs. You might need to write a reconnection process and such depending on the specifications of your Web app.
Process after a Push Message Arrives
The callback function which is called after a push message arrives displays the push message on the screen.
Both libraries can get the payload of the PUBLISH command from Kii Cloud when the function is called.
First, check the name of the topic which issued the PUBLISH command. If it is the same as the subscribed topic name in the
mqttTopic, the PUBLISH command was issued by the push notification.If the names are the same, get the detail of an event on Kii Cloud as a string in JSON format from the payload of the PUBLISH command.
Ensure to check the MQTT topic name on receiving the PUBLISH command from the server because the PUBLISH command is used for various purposes. Also, ignore PUBLISH commands with unknown MQTT topic names for future enhancement.
We will set a message in the
mymessagefiled as below to send a test message in the next topic. The receive process will parse the JSON string in the payload to extract and display themymessagefield on the screen.{ "sourceURI":"kiicloud://users/727f20b00022-8d18-5e11-991f-06db2509", "mymessage":"Hello", "senderURI":"kiicloud://admins/APP_ADMIN" }
The MQTT connection is disconnected when the client does not send any message in a certain amount of time unless the client does not send the PINGREQ command. You do not need to implement the command because the two libraries used in this tutorial automatically send it.
Let us move to the next step: Send Test Messages
| << Integrate a Library | Send Test Messages >> |