Running Sample Programs
Once you have built the mobile app and thing program, run them to send commands and state information.
Check the functionalities of the mobile app by following these steps below while you can play with the mobile app in any way.
Sharing IDs of the thing
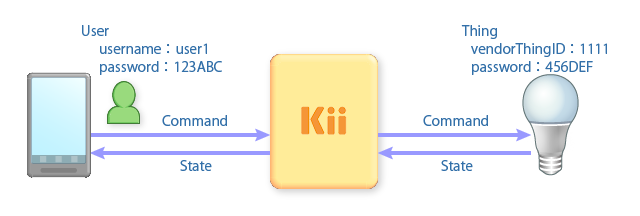
To make use of an IoT solution, the thing needs to share its IDs with the mobile app.
As seen in Structure of Hello Thing-IF, the application on Kii Cloud could have numerous users and things. The mobile app needs to identify the thing to operate with IDs of the thing.
In this tutorial, we use the username and vendorThingID in the below figure.
The vendorThingID is a string to uniquely identify a thing within an application. The vendor or developer can freely define it.
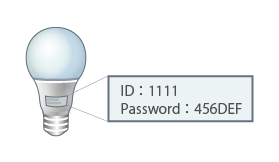
Suppose that the vendorThingID is assigned to each of thing hardware in advance at factory shipment and the vendorThingID and the password are printed on the sticker on the purchased product.
When the thing is registered with the vendorThingID, Kii Cloud assigns the thingID to the thing. This is not a value determined by the vendor but an ID automatically generated on the server side.
After this assignment, the user program can identify the thing with either the vender-defined vendorThingID or the server-assigned thingID.
Pay attention to thingID assignment. If a thing has an thingID, it means that the thing has been registered to the server side.
If the vendorThingID is a predictable string like a serial number, the risk of attack from a third party is increased. Kii recommends using random strings which are as much unpredictable as possible.
If it is difficult to assign vendorThingIDs to things at factory shipment, you can have the mobile app automatically generate it. See the last topic of this tutorial, Hints for the Next Step, for more information.
Preparing the thing
First, run the thing program.
The sample program expects the vendorThingID and the thing password as command line arguments. Suppose that the vendorThingID and the thing password are set to each product at factory shipment. We manually simulate the thing's initial program loader which runs the below command.
$ ./hellothingif 1111 456DEF
The above command internally onboards the thing. After running the command, the console displays Waiting for commands and goes into the wait mode. That is, the thing has been registered to Thing Interaction Framework with the vendorThingID and the password specified on the command line.
Sending the state is displayed once in a minute. This message means state information is being uploaded.
Waiting for commands
Sending the state
Sending the state
Sending the state
Running the mobile app
Next, launch the mobile app on an Android device. You can use the debug feature of Android Studio.
Try the following operations:
The mobile app and the thing are connected via the Internet. When you test Hello Thing-IF, the thing and the mobile app would be physically close. Keep in mind that users in production environments might remotely operate things from distant places.
Launch the mobile app
The below screen opens when you launch the mobile app. Enter the credentials of the user and the smart LED light to onboard the light.

Enter the following information as shown at the beginning of this topic.
- Username:
user1 - Password:
123ABC - vendorThingID:
1111 - ThingPassword:
456DEF
- Username:
Create the user
Onboarding creates a thing object on Kii Cloud as required. The user who will be a thing owner needs to be created before onboarding.
Create the user by entering the Username and the Password and clicking ADD USER.
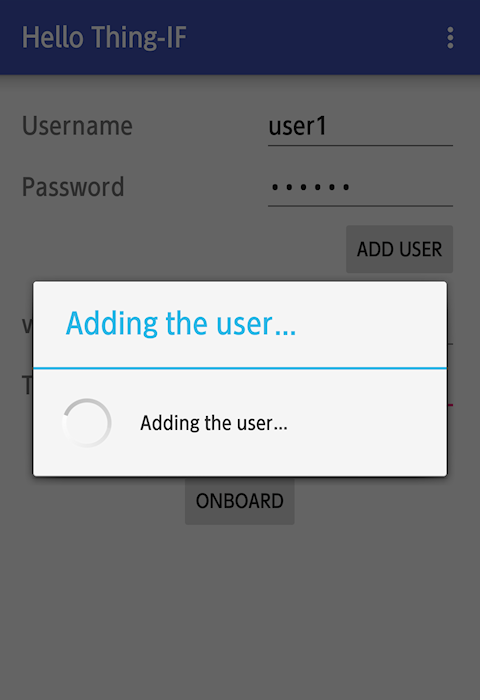
If you click the button more than once, you will get an error because it attempts to create the same user. However, such an error does not affect the onboarding process.
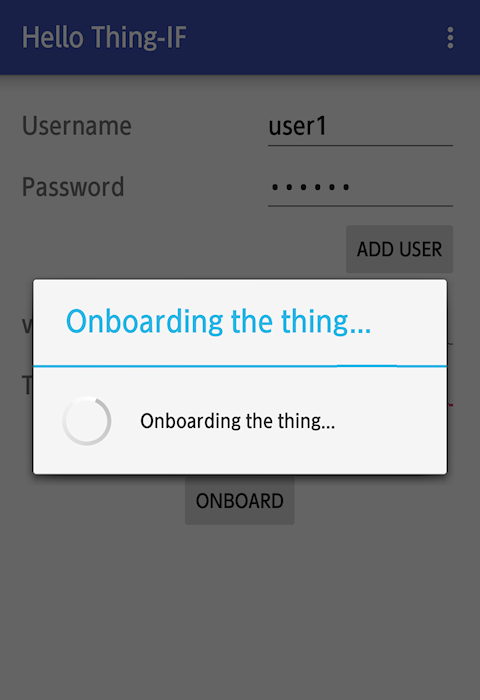
Onboard the thing
Once the user is created, click ONBOARD to complete onboarding. It associates the user with the thing and the user becomes the owner of the thing.
Run commands
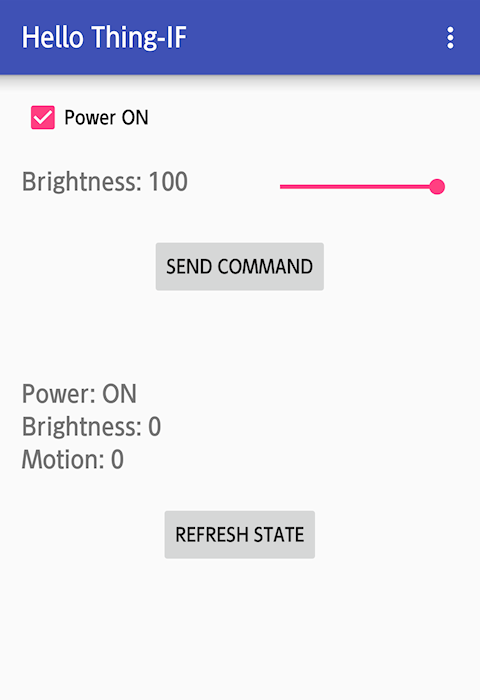
Once the thing is onboarded, the command screen automatically opens. At the same time, push notification is initialized in the background and the result will be displayed in the toast.
Enter the command to send to the smart LED light on the upper side of the screen. Specify if you want to turn on/off the power and the desired brightness level. Click SEND COMMAND.
Review the command result
The response to the sent command is displayed in the toast as below. The displayed string is the command ID assigned to the sent command.
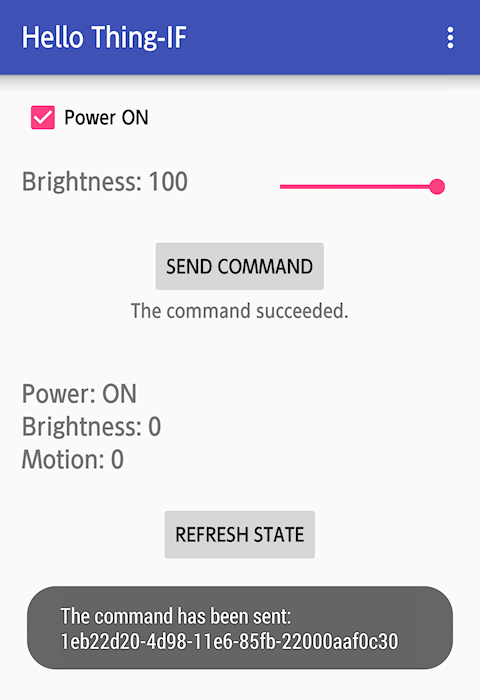
At this time, the result of command execution is displayed under the SEND COMMAND button.
The command succeededindicates that all the actions in the command have been successfully processed on the thing.If
The command succeededis not displayed, probably the push notification feature is not correctly configured. See the "Troubleshooting" (Android, iOS) topic for push notification to find out corrective actions. If the problem persists, try creating a new project to walk through the push notification tutorial, which is the base of the push notification feature of Hello Thing-IF.Even if the thing program is not running, the command ID will be displayed because Thing Interaction Framework accepts the command. However,
The command succeededwill not be returned because the thing cannot receive the command. Try sending a command after you stop the thing program by pressing Ctrl + C in the thing console. Restart the thing program after you confirm the behavior of Thing Interaction Framework.Check the thing
After you sent a command, the console running the thing program indicates that the program received actions as below.
Sending the state
Sending the state
Sending the state
Schema=HelloThingIF-Schema, schema version=1, action name=turnPower, action params={"power":true}
Light: Power on, Brightness: 0
Schema=HelloThingIF-Schema, schema version=1, action name=setBrightness, action params={"brightness":100}
Light: Power on, Brightness: 100
Sending the state
The above messages indicate that the thing program received two actions through receiving one command. The first action is
turnPowerwith the parameter{"power":true}and the second action issetBrightnesswith the parameter{"brightness":100}.The lines starting with
Light:under the action description show the state of the LED bulb on the thing. As a result of the thing's receiving the two actions, the second line indicates the bulb is turned on and its brightness level is 100. The sample program outputs state information withprintf(), which would be replaced with a process for the I/O ports in a practical scenario.Check an error in command execution
Next, click SEND COMMAND again on the mobile app while the brightness level remains 100.
This time, the error
Bulb is overheatingis displayed as a result of command execution.
The error message will be displayed on the thing. It is at the fourth line in the below sample.
Schema=HelloThingIF-Schema, schema version=1, action name=turnPower, action params={"power":true}
Light: Power on, Brightness: 100
Schema=HelloThingIF-Schema, schema version=1, action name=setBrightness, action params={"brightness":100}
Error: Bulb is overheating.
Sending the state
This error demonstrates the functionality of the Thing-IF SDK to check errors on the thing. The thing program returns the error message
Bulb is overheatingif it receives two consecutivesetBrightnessaction with the brightness level of 100 so that you can experience an error check process. The Thing-IF SDK can return errors from the thing to the mobile app as seen in this example.Change the brightness level
Next, change the brightness level and send a command.
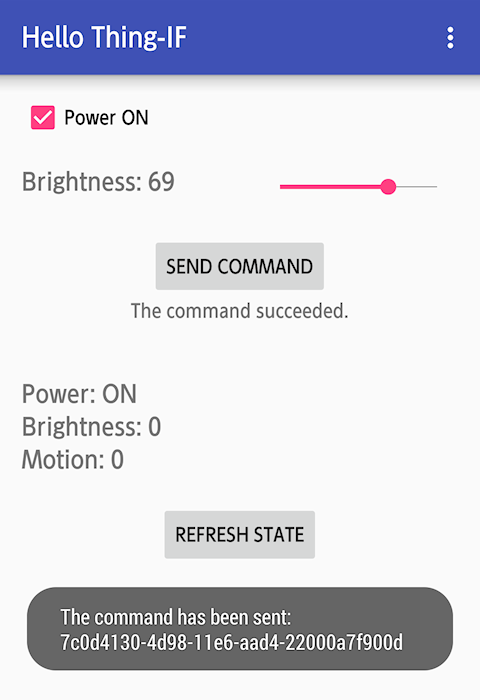
You should be able to see the change in the parameter value of the
setBrightnessaction on the thing according to the brightness level sent from the mobile app.Schema=HelloThingIF-Schema, schema version=1, action name=turnPower, action params={"power":true} Light: Power on, Brightness: 0 Schema=HelloThingIF-Schema, schema version=1, action name=setBrightness, action params={"brightness":69} Light: Power on, Brightness: 69 Sending the stateReceive state information
Finally, receive state information. Click REFRESH STATE to view the latest state information registered by the thing on the screen.
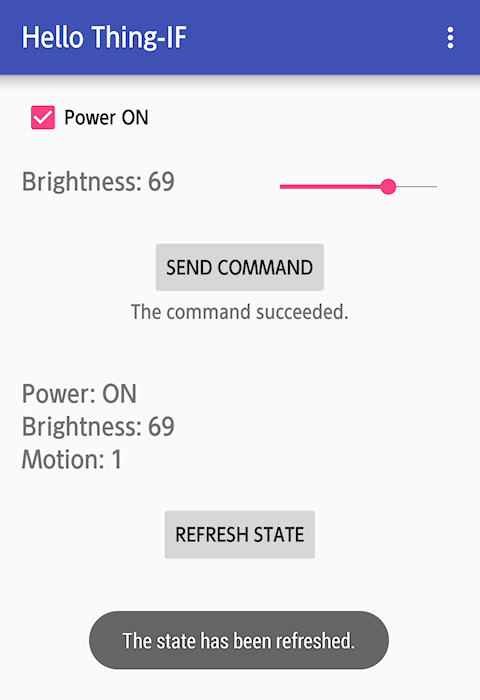
Change the parameters, click SEND COMMAND, and click REFRESH STATE so that you can see
PowerandBrightnesschange according to the values set in the last command.Motion, the value of the motion sensor, also changes every time state information is registered on the thing.
What's next?
Now you have completed the overview section. Let us walk through the Android mobile app.
Go to Android Mobile App.
If you want to learn more...
- See Onboarding for more information about ID assignment for things.