Enabling the Kii Push Notification Feature with JPush
Follow the steps in this topic to use JPush push notification in the mobile app of Hello Thing-IF.
Creating a JPush project
The first step is to create a project on the JPush admin console and get your JPush AppKey and Master Secret.
Log in to the JPush admin console.
Note: You need to be registered as a JPush developer in order to walk through this tutorial.
Creating a project
Click 创建应用 (Create application).

Fill in the following fields and click 创建我的应用 (Create my application).
- 应用名称 (Application name)
- Specify
Hello ThingIF. This is the project name to identify your application on the JPush admin console.
- Specify
- 应用包名 (Application package name)
- This is the package name of the Android mobile app. Specify
com.kii.sample.hellothingifwhich is used in the Hello Thing-IF project.
- This is the package name of the Android mobile app. Specify

Now the JPush project is created.
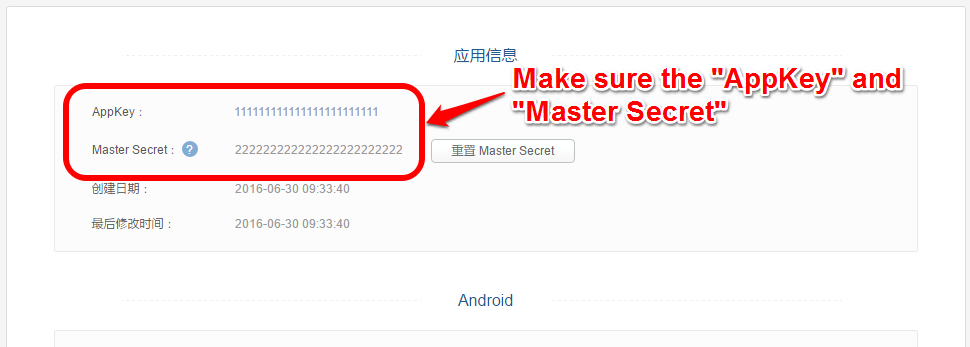
Check the values shown as the AppKey and Master Secret. We will later set these values in the Kii Cloud developer portal and the source code of the sample program.
Configuring Kii Cloud
Now you will register the JPush AppKey and Master Secret on the Kii Cloud developer portal.
Open the Kii Cloud developer portal (http://developer.kii.com) and configure your application.
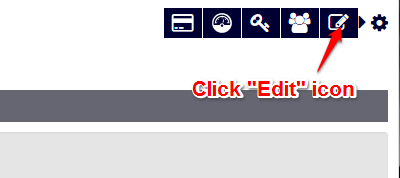
On the application console, click the Edit icon.
Now Select PUSH NOTIFICATIONS. On the push notification configuration screen, set your JPush AppKey and Master Secret.
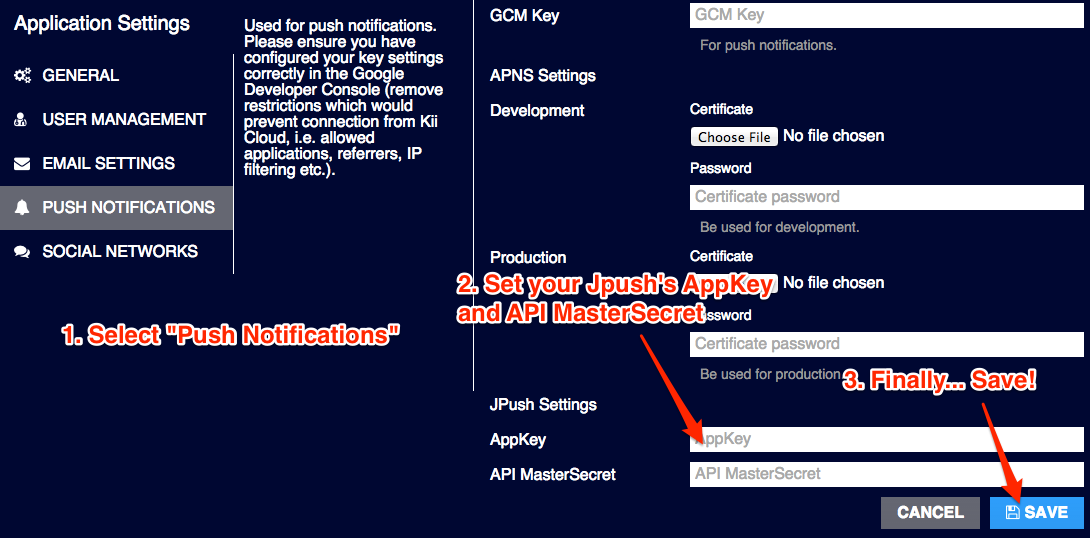
When you are done, click the SAVE button.
Configuring the build environment
Next, configure your build environment.
Integrate the JPush Android SDK to your development project as a library so that you can invoke the JPush functions.
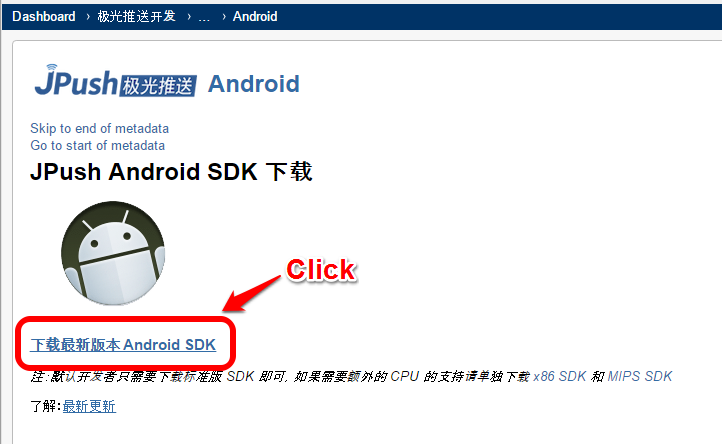
First, download the JPush Android SDK by clicking the link "下载最新版本 Android SDK" (as of July 2016).
Next, set up your environment in Android Studio.
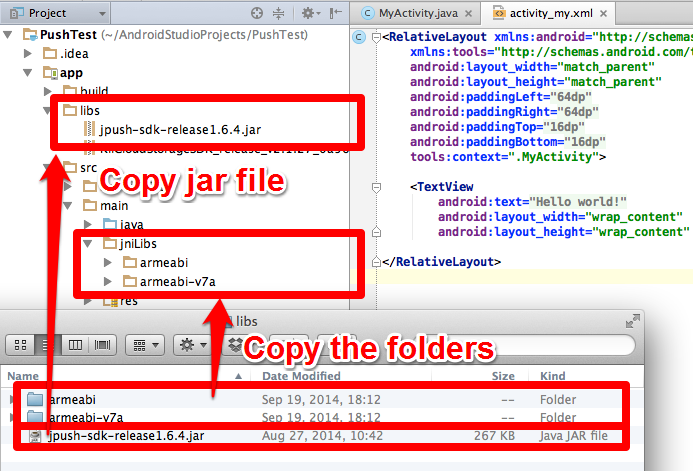
Unzip the downloaded ZIP file and find the libs directory. Copy all the files in the directory to your project directory as follows.
Copy the JAR file to the
app/libsdirectory of your project.Create the
jniLibsdirectory under theapp/src/maindirectory of your project. Then copy all the folders which contain an SO file to the created directory. The number of the folders containing an SO file varies among different versions of the SDK.
Configuring the manifest file
Edit AndroidManifest.xml.
The Hello Thing-IF project has already been almost configured but you need to update one setting as below. Replace YOUR_JPUSH_APP_KEY with your JPush AppKey at the end of AndroidManifest.xml.
<?xml version="1.0" encoding="utf-8"?>
<manifest xmlns:android="http://schemas.android.com/apk/res/android"
    package="com.kii.sample.push"
    android:versionCode="1"
    android:versionName="1.0" >

    ......

        <meta-data android:name="JPUSH_CHANNEL" android:value="developer-default" />
        <meta-data android:name="JPUSH_APPKEY" android:value="YOUR_JPUSH_APP_KEY" />

    </application>
</manifest>
If you want to learn more...
- See Android (JPush) Push Notification Tutorial to learn how to set up JPush in a new project.