Create a Firebase Project
The first step is to create a project in the Google environment.
Note: You need to have been logged in with a Google account which can use the Firebase console in order to walk through this tutorial.
You create a project with the Firebase console.
Creating a Firebase project
Follow the steps below.
Open the Firebase console.
Click "Create a project".
The "Create a project" window opens.
Enter the following information to create a new project.
- Project name
EnterPushTest. This is the project name of your app in the Firebase console.
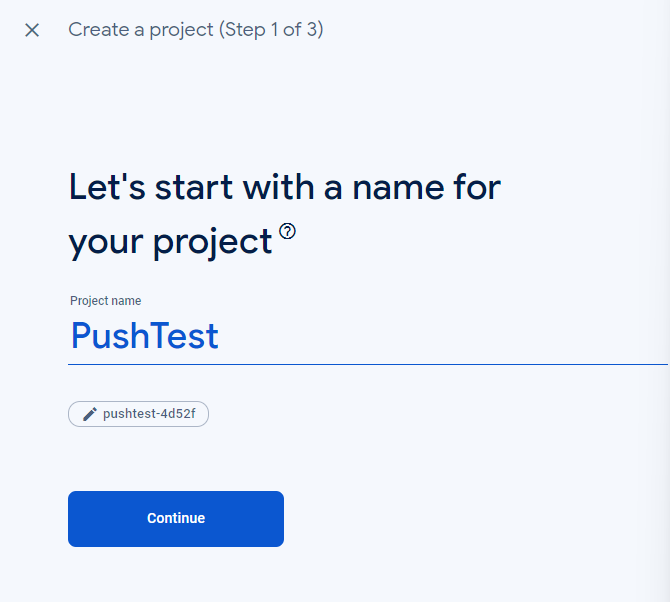
- Project name
The project overview page opens.
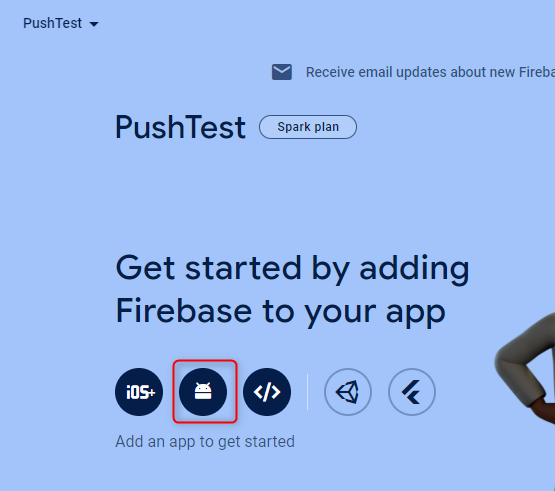
Creating an Android app and getting the private key
Follow the steps below.
Click the Android icon to start adding an Android app.
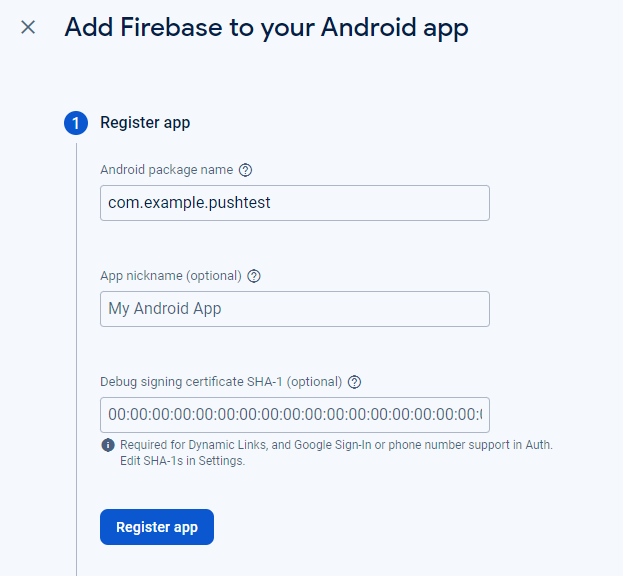
The "Add Firebase to your Android app" screen opens.
Enter the package name of the mobile app. Specify the package name specified when you created the project in Android Studio. It is
com.example.pushtestin this tutorial.You can omit the app nickname and the debug signing certificate SHA-1 if you use only the FCM feature. Otherwise, follow the on-screen instructions.
Click "Register app" to continue.
Continue the configuration by following the on-screen instructions.
- Perss the "Download google-services.json" button to download the google-services.json file to your machine. You will set up the google-services.json file in Android Studio.
- Ignore the instruction to modify the build.gradle file because the modification instructed on the screen will cause a build error. We will modify the build.gradle file in a later step.
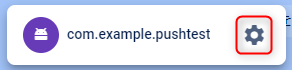
On the project overview page, you will now see the
com.example.pushtestin the app list.
Select the app and click the gear icon to open the project setting screen.
On the project setting screen, follow the steps below:
- Select the "Service accounts" tab
- Press the "Generate new private key"
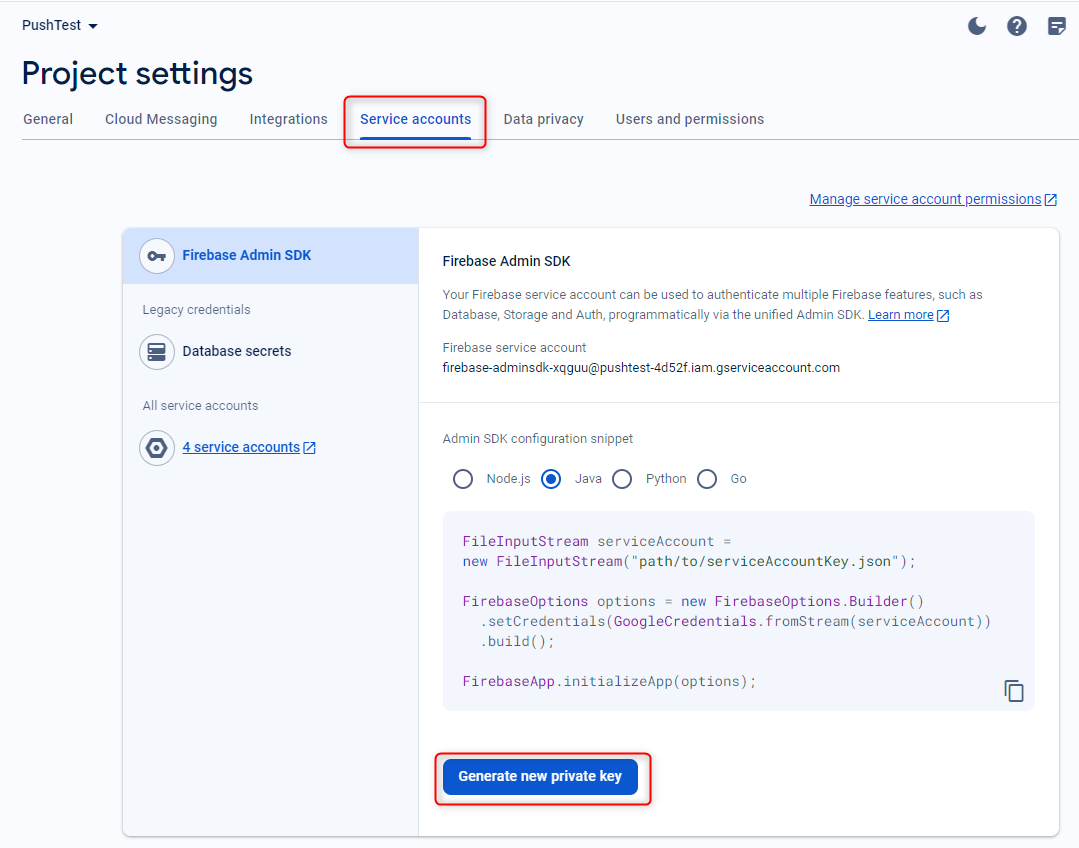
The confirmation screen shows up. Press the "Generate key" button to download the private key.

That is it for the Firebase configuration. You can close the browser now.
Let us move to the next step: Configure Kii Cloud.
| << Create an Android Application | Configure Kii Cloud >> |